Creating a Cocoa Touch Framework
Packaging your code in a Framework is a great way of sharing code between apps or modularizing the code. You can also package your code in a framework and distribute it as a third-party library.
Let’s build a Cocoa Touch framework!
- Launch Xcode and select File ▸ New ▸ Project…
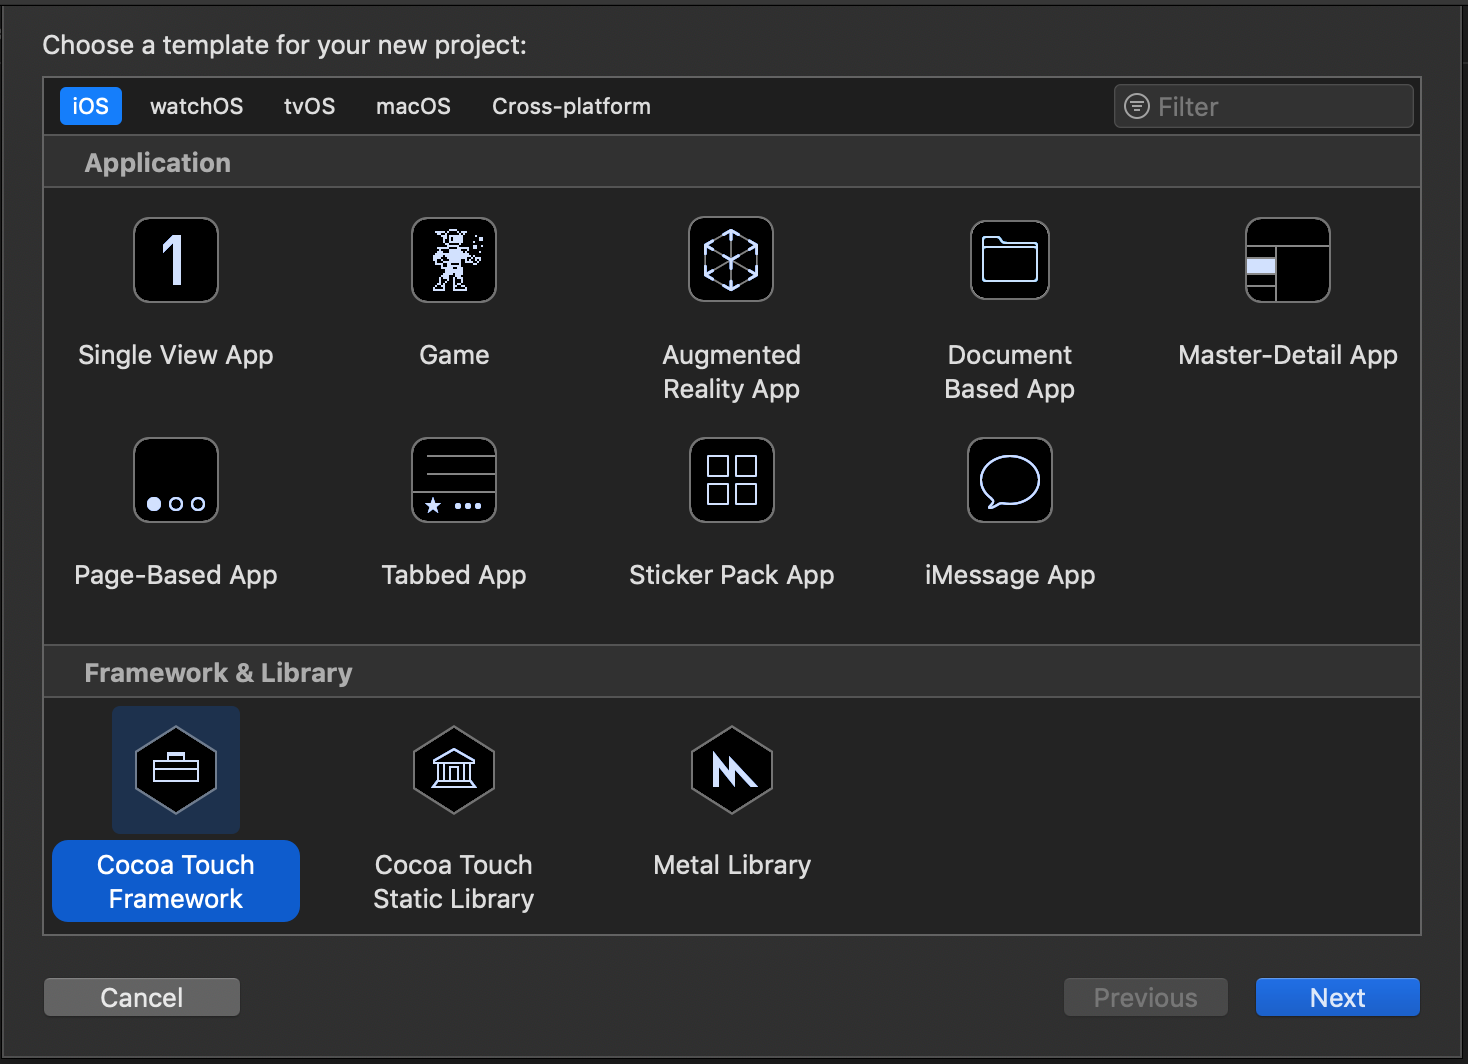
- Choose iOS ▸ Framework & Library ▸ Cocoa Touch Framework and click Next.
Enter a name for the framework in the next screen. In this example, I will call it MyFramework. Click Next. Choose a location for the project and click Create.
Press command+b to build the project. And that is it! We created our first Cocoa Touch Framework!
And the rest of the steps are similar as to when you are creating a regular app:
Of course at this point, the framework is empty and doesn’t do anything. Next let’s add all the code that we want to share in our framework.
Adding Code to the Framework
In this example, I am going to add a class to the framework. Let’s call it HelloWorld which is going to have a single function named sayHello():
- Add a new Swift file to the project by selecting File ▸ New ▸ File… ▸ Swift File
- Enter a name for the file in the Save As text field and press Create. I am going to name the file HelloWorld.
- Add the following code to the newly created Swift file:
public class HelloWorld{
 public init(){
  print("Initialized")
 }
 public func sayHello(){
  print("Hello World!")
 }
}
Notice the public access modifier before the class declaration, initializer and sayHello() function. This is important because by default all classes and functions are internal, which means they are only accessible inside the module but not to outside modules. Since we want this class to be accessible to the applications that will be using our framework, we need to add public access modifier to the class and also to all the initializers and functions of the class that we want to make available to outside code.
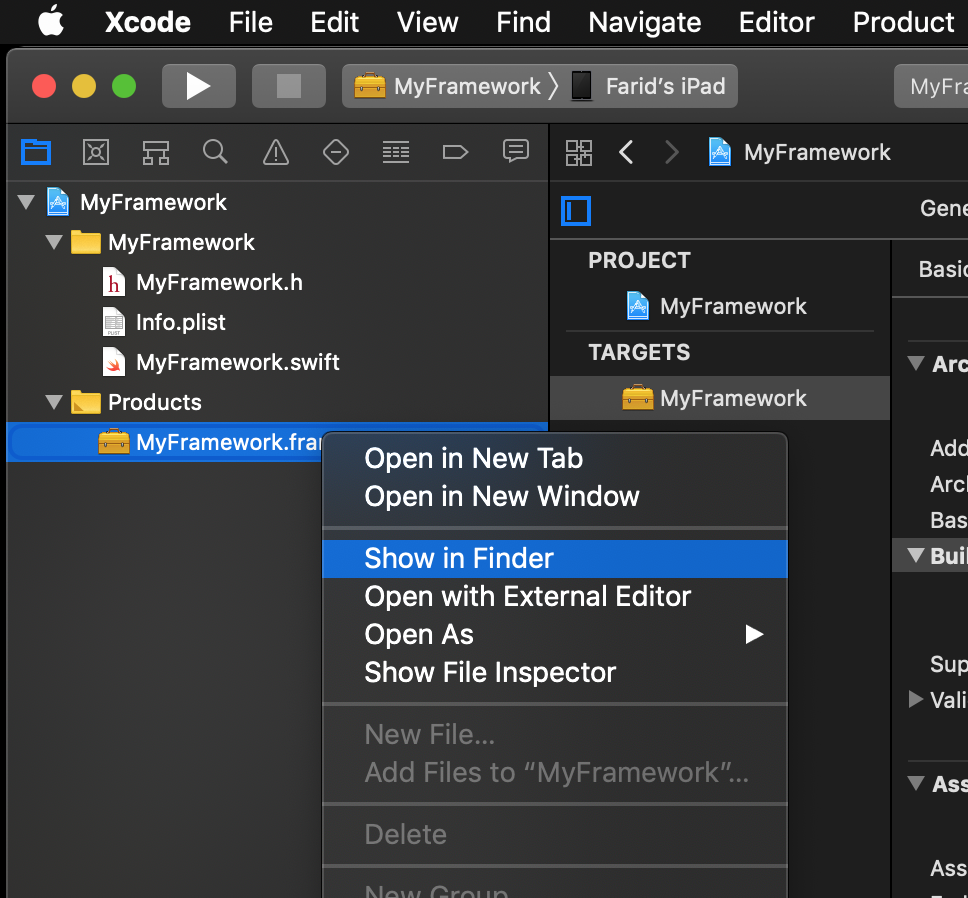
- Press command+b to build the framework. Next, in the Project Navigator, expand the Products group, right click on MyFramework.framework(or whatever name you have chosen for your framework) and select Show In Finder:
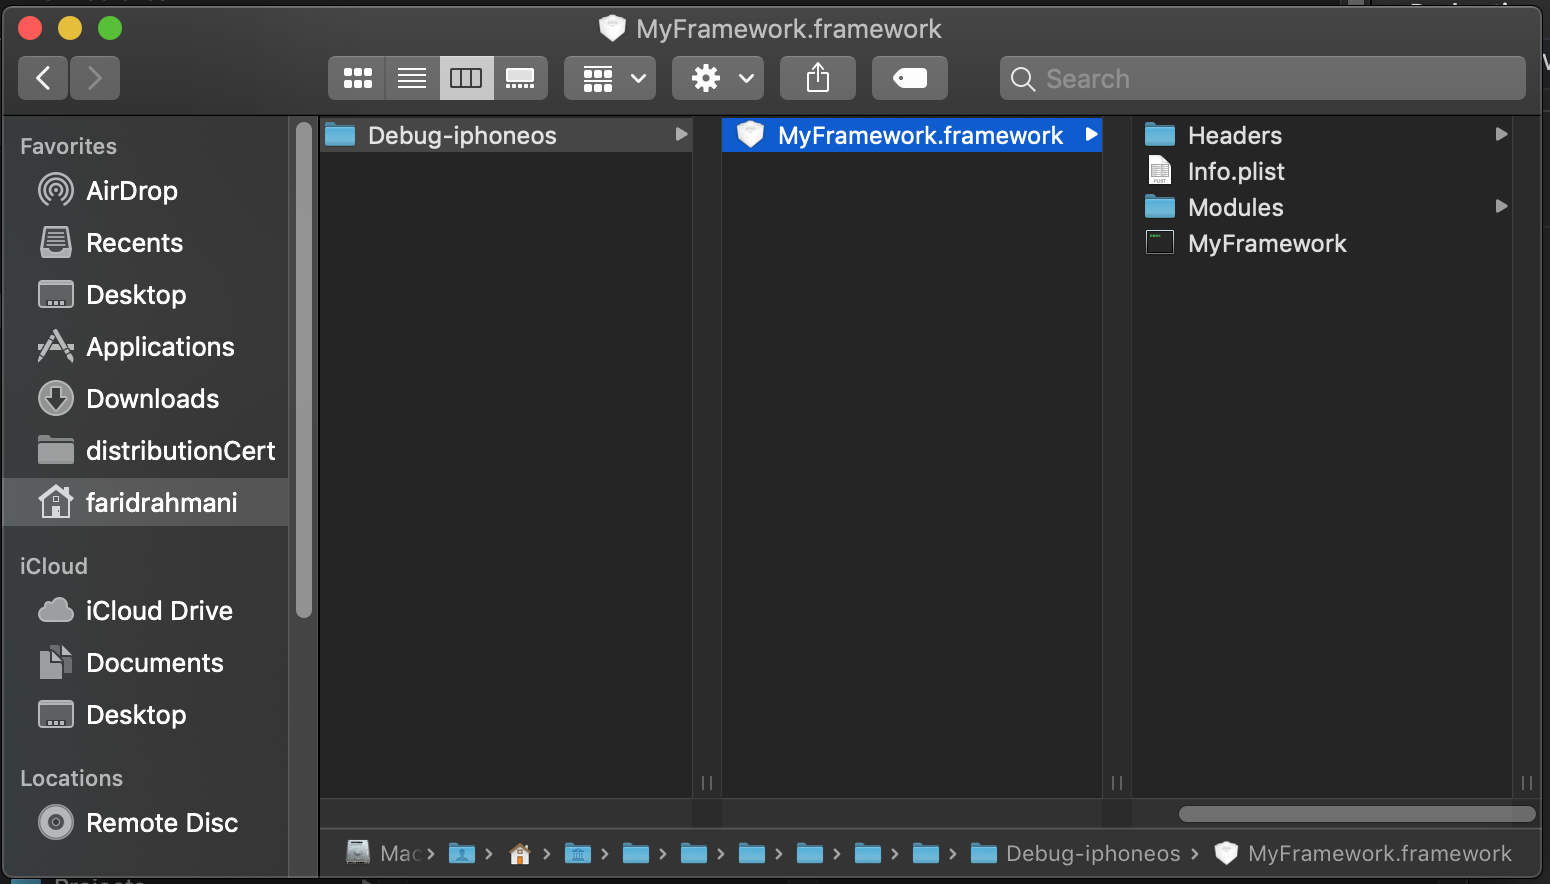
And there it is your framework!
Adding the Framework to Our Application
Time to test our framework! Let’s create an application and add our framework to it.
- Create a new iOS app project by selecting File ▸ New ▸ Project… and choosing Single View App template.
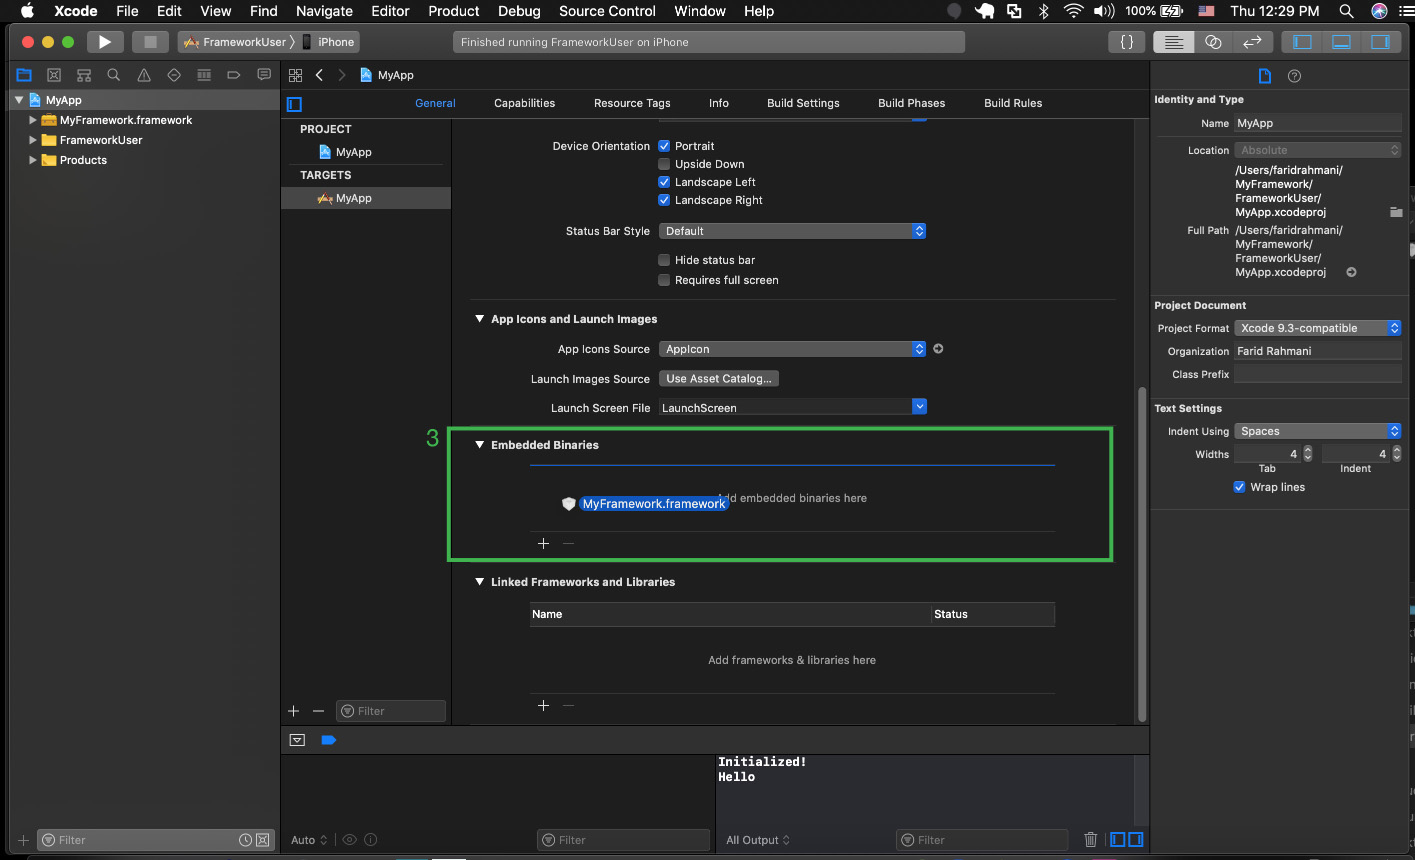
- Select your project root in the Project Navigator. This will open project settings page in the middle window. Select General if it is not already selected. Scroll down to the end of the page until you find Embedded Binaries section.
- Drag and drop the framework from the Finder window into the Embedded Binaries section. Xcode will embed the framework binary and automatically link the app with our framework.
Using the Framework In Our App
To use the framework in our app, we just need to import it as we would import any other iOS framework:
import MyFrameworkand that is it. All the public classes and functions inside the framework are now available to our application code.